Creating Depth and Character with a Decorative Wall Panel Dog Template
There is a distinct satisfaction in transforming a flat, empty wall into a focal point that tells a story. For many homeowners and creators, the challenge isn't just finding art that fits a space, but finding pieces that add texture and dimension without costing a fortune or requiring months of manual carving. This is where a Decorative Wall Panel Dog Template becomes an invaluable resource. It isn't merely a digital file; it is a blueprint for bringing the beauty of the animal kingdom to life through layered craftsmanship. By utilizing a design that combines the silhouette of a beloved pet with intricate ornamental flower patterns, you can create a multi-layered masterpiece that adds genuine depth and elegance to any room.
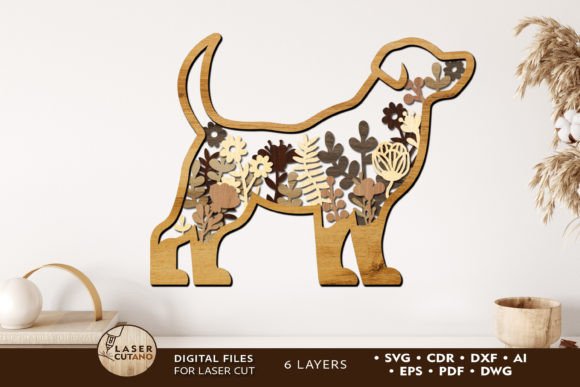
The concept behind this specific template is rooted in the growing popularity of layered vector art. Unlike a standard poster or a single-cut sign, this design consists of six distinct layers. When assembled, these layers create a shadow-box effect, turning a two-dimensional image into a sculptural piece. The interplay between the solid shapes of the dog and the delicate cutouts of the floral elements allows light and shadow to dance across the surface, changing the look of the artwork depending on the time of day and the angle of the light. This dynamic quality is something flat prints simply cannot achieve.
Real-World Applications for Hobbyists and Homeowners
For the weekend warrior or the DIY enthusiast, this template offers a project that feels professional but remains accessible. Imagine you have a blank spot in your living room above the sofa, or perhaps a nursery that needs a gentle, nature-inspired touch. Using this Animal Laser Cut File, you can produce a custom piece that looks like it was commissioned from a high-end boutique. The recommended materials—plywood, MDF, acrylic, or even thick cardboard—are readily available at local hardware stores.
Consider the scenario of a pet owner who wants to memorialize their dog without using a standard photograph. By selecting a wood tone that matches their existing furniture and painting the individual layers before assembly, they can create a stylized representation of their companion. The process involves cutting the six layers, sanding the edges for a smooth finish, applying paint or stain to each tier to create contrast, and then gluing them together. The result is a 12 x 8 inch (or larger, if scaled) piece of art that serves as a conversation starter. It brings nature into the home not just through the subject matter, but through the tactile quality of the materials used.
Furthermore, the versatility of the file formats ensures that regardless of the equipment you own, you can proceed. Whether you have a hobbyist diode laser, a professional CO2 machine, or even access to a local makerspace, the availability of .AI, .SVG, .DXF, .DWG, .CDR, .EPS, and .PDF formats means compatibility is rarely an issue. You simply download the .zip file, unzip the folder, and load the appropriate file into your preferred software like LightBurn, Illustrator, or CorelDRAW.
Commercial Opportunities for Small Business Owners
Beyond personal decoration, this template holds significant potential for entrepreneurs and small business owners looking to expand their product lines. The market for personalized home decor is robust, and customers are increasingly seeking unique, handcrafted items over mass-produced goods. A creator running an Etsy shop or selling at local craft fairs can use this layered SVG file to produce inventory quickly while maintaining a high perceived value.
Because the design is scalable, you aren't limited to the default 12 x 8 inch size. You could create smaller versions to sell as premium gift tags or ornaments during the holiday season, or scale them up to create large statement pieces for interior designers. The key to profitability here lies in material selection and finishing. For a rustic boutique, using reclaimed wood with a natural oil finish appeals to a specific demographic. For a modern, urban clientele, cutting the layers from colored acrylic or plexiglas creates a sleek, contemporary vibe.
The six-layer structure also allows for creative pricing strategies. You might offer a "kit" version where the customer receives the cut layers and assembles it themselves, appealing to the DIY market. Alternatively, you can sell the fully assembled and painted finished product at a higher price point. The intricate floral patterns within the dog silhouette add a level of complexity that suggests high labor value, allowing you to command better margins compared to simple text-based signs.
Educational and Community Uses
Educators and community workshop leaders can also find immense value in this resource. In a vocational training setting or a after-school STEM club, working with laser cutters teaches precision, design thinking, and material science. This svg animals file provides a perfect case study for understanding how vector paths translate into physical objects. Students can learn about kerf (the width of the laser cut), material thickness tolerances, and the importance of layer ordering.
For a community art project, groups could collaborate to create a mural composed of multiple dog silhouettes, each decorated differently by participants. This fosters creativity while utilizing a unified template to ensure visual cohesion. The act of painting the layers before gluing, as recommended, becomes a lesson in planning and execution, as mistakes are harder to fix once the pieces are adhered.
Practical Considerations Before You Begin
While the possibilities are exciting, there are practical factors to consider before diving into production. First, pay close attention to the recommended material thickness. The design is optimized for materials ranging from 3mm to 6mm (approximately 1/8 inch to 1/4 inch). If you choose a material that is too thin, the layers may not provide enough depth to cast meaningful shadows, flattening the visual impact. Conversely, if the material is too thick, the intricate floral details might become fragile or difficult to cut cleanly without burning the edges.
Scaling is another critical element. You can certainly increase the size of the design to fit a larger wall space, which often makes the cutting process easier on thinner materials. However, if you intend to reduce the design, you must be cautious. The "thin elements" mentioned in the product details refer to the delicate stems and petals within the ornamental patterns. Shrinking the file too much can cause these fine lines to disappear entirely during the cutting process or break easily during handling. Always run a test cut on a scrap piece of your chosen material when experimenting with new sizes.
Preparation is also key to a polished final look. Because this is a multilayer model where each layer is glued, the order of operations matters. It is highly advisable to paint or stain each layer individually before assembly. Trying to paint the nooks and crannies after the layers are stacked often leads to messy edges and pooled paint. Using contrasting colors between layers—for example, a dark walnut stain on the bottom layers and a lighter natural wood tone on the top—can exaggerate the 3D effect and highlight the ornamental flower patterns.
Ultimately, whether you are a freelancer looking to diversify your digital offerings, a parent wanting to create a unique gift, or a decorator seeking to fill a void in a room's aesthetic, this template provides a solid foundation. It bridges the gap between digital convenience and tangible artistry. By understanding the nuances of material selection, scaling, and finishing, you can transform a simple download into a captivating piece of wall art that truly brings the beauty of the animal kingdom to life. Enjoy the process of creation, and let the layered depths of your new project add a touch of warmth and character to your environment.